
Integrations Setup
Kindo supports integrations using Nango for authentication and the MCP protocol for agent access to external systems. Most MCP servers are built in-house and run by the customer as part of a self-managed installation, though a growing number of official hosted MCPs can be accessed directly.
Nango Setup
Section titled “Nango Setup”Connecting Nango to Your Installation
Section titled “Connecting Nango to Your Installation”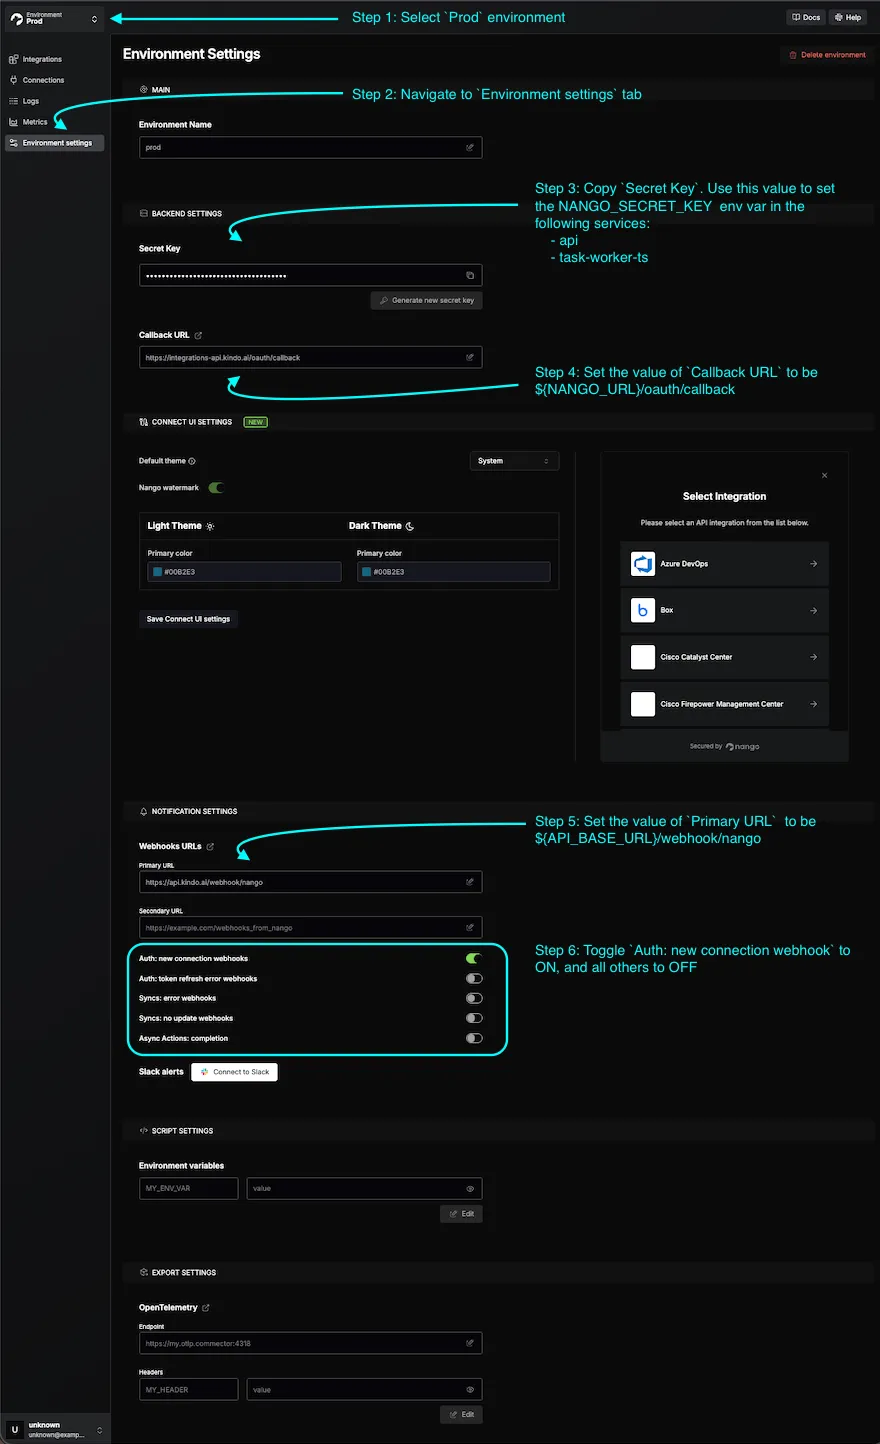
1. Set Environment Variables in Kindo
Section titled “1. Set Environment Variables in Kindo”| Variable | Description | Required Services |
|---|---|---|
NANGO_SECRET_KEY | Shared secret key for Nango integrations | api, task-worker-ts |
NANGO_URL | Host on the Ingress pointing to the nango service (must match your Nango dashboard URL) | api, task-worker-ts |
API_INTEGRATION_WEBHOOK_BASE_URL | The URL of your API service with /webhook/integration-connection appended (e.g., https://<API_HOST>/webhook/integration-connection). This is where third-party services (Linear, Jira, etc.) send webhook events. | task-worker-ts |
NEXT_PUBLIC_NANGO_API_URL | Same as NANGO_URL | next |
NEXT_PUBLIC_NANGO_CONNECT_URL | Host on the Ingress pointing to the nango-connect-ui service | next |
2. Set Environment Variables in Nango
Section titled “2. Set Environment Variables in Nango”-
Set the Callback URL to
${NANGO_URL}/oauth/callback. -
Configure the webhook:
- In the Nango dashboard, go to Environment Settings > Webhook URLs.
- Set Primary URL to
${API_BASE_URL}/webhook/nango(whereAPI_BASE_URLmatches the API service environment variable). - Select the Prod environment.
- Toggle ON
Auth: new connection webhooks. All other toggles can be OFF.
For self-managed Kindo installs, this secret is managed by the installer and applied to both Nango and the Kindo services that use it.
Configuring New Integrations
Section titled “Configuring New Integrations”The set of integrations available in a Self-Managed install is driven by the Kindo integration catalog that ships with each release. On deploy — and on every kindo integrations apply — the reconciler creates the corresponding Nango integration instances for the integrations you have enabled, so for a production install you do not hand-create them in the Nango dashboard.
The Nango dashboard is still where you supply the provider-side configuration the reconciler cannot generate: the OAuth Client ID and Client Secret for OAUTH2 integrations (see OAUTH2 Integrations) and any webhook secrets (see Integration Webhooks).
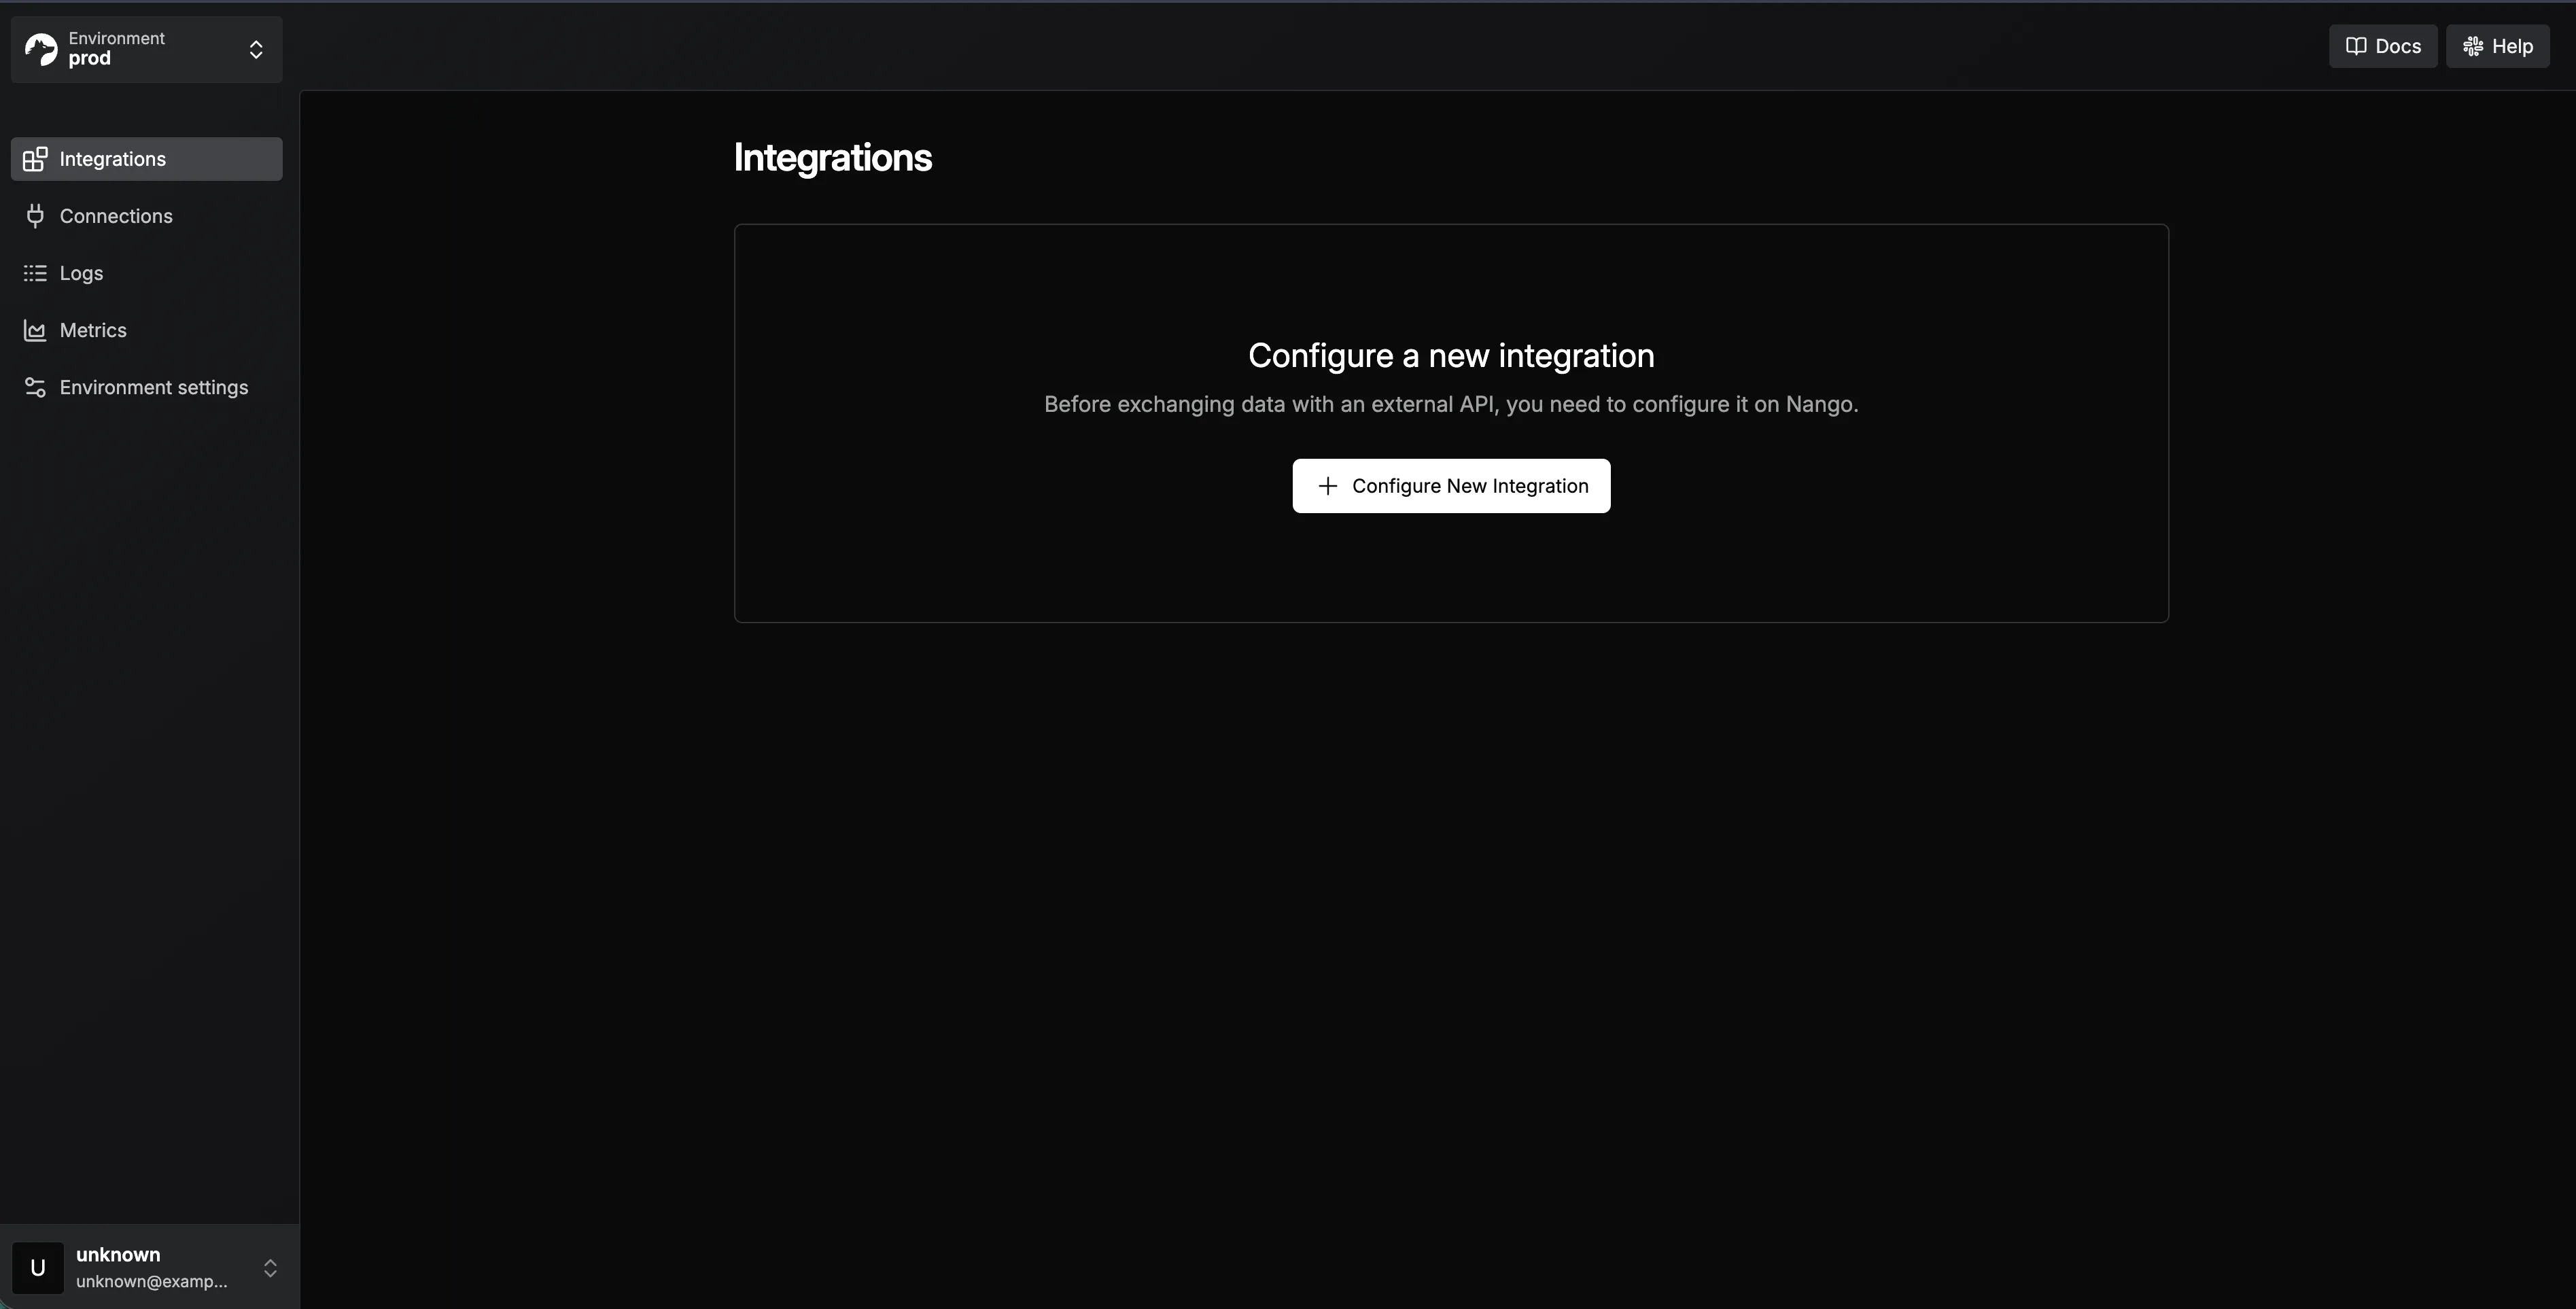
For local or ad-hoc experimentation you can still configure an integration directly in the Nango dashboard (Integrations > Configure New Integration > select the integration and auth method):
Supported Integrations
Section titled “Supported Integrations”The integrations below have their authentication method and setup notes on this page. For the full inventory of integrations and the tools each one exposes to an agent, see the Tool Catalog.
| Integration | Auth Method | Notes |
|---|---|---|
| Azure DevOps | BASIC | |
| Box | OAUTH2 | |
| Cisco Catalyst | BASIC | |
| Cisco FMC | BASIC | |
| Cofense Triage | OAUTH2_CC | |
| CrowdStrike Falcon | OAUTH2_CC | |
| Datadog | API_KEY | |
| Dropbox | OAUTH2 | Requires file and account scopes |
| GitHub | OAUTH2 | Scopes: repo, read:org, user |
| GitLab | OAUTH2 | Scopes: api |
| Google Docs | OAUTH2 | Requires documents and drive scopes |
| Google Drive | OAUTH2 | Requires userinfo and drive scopes |
| Google SecOps | OAUTH2 | Configured per connection |
| Grafana | API_KEY | |
| Graylog | BASIC | |
| Jira | OAUTH2 | Requires Jira API and User Identity API scopes |
| Linear | OAUTH2 | Scopes: admin, read, write |
| Microsoft Entra ID | OAUTH2 | |
| Microsoft OneDrive | OAUTH2 | Requires Files scopes |
| Microsoft Outlook Calendar | OAUTH2 | Requires Microsoft Graph calendar and contacts scopes |
| Microsoft Teams | OAUTH2 | Requires Teams and Chat scopes |
| Neo4j | BASIC | |
| NVD | API_KEY | |
| SailPoint | OAUTH2_CC | |
| SAP S/4HANA | BASIC | OData and RFC variants |
| ServiceNow | OAUTH2_CC | |
| Slack | OAUTH2 | Requires channels, chat, and users scopes |
| Smartsheet | OAUTH2 | Requires sheets, folders, and workspaces scopes |
| Sourcegraph | API_KEY | |
| Splunk | API_KEY | |
| Sumo Logic | BASIC | |
| Tenable | API_KEY |
OAUTH2 Integrations
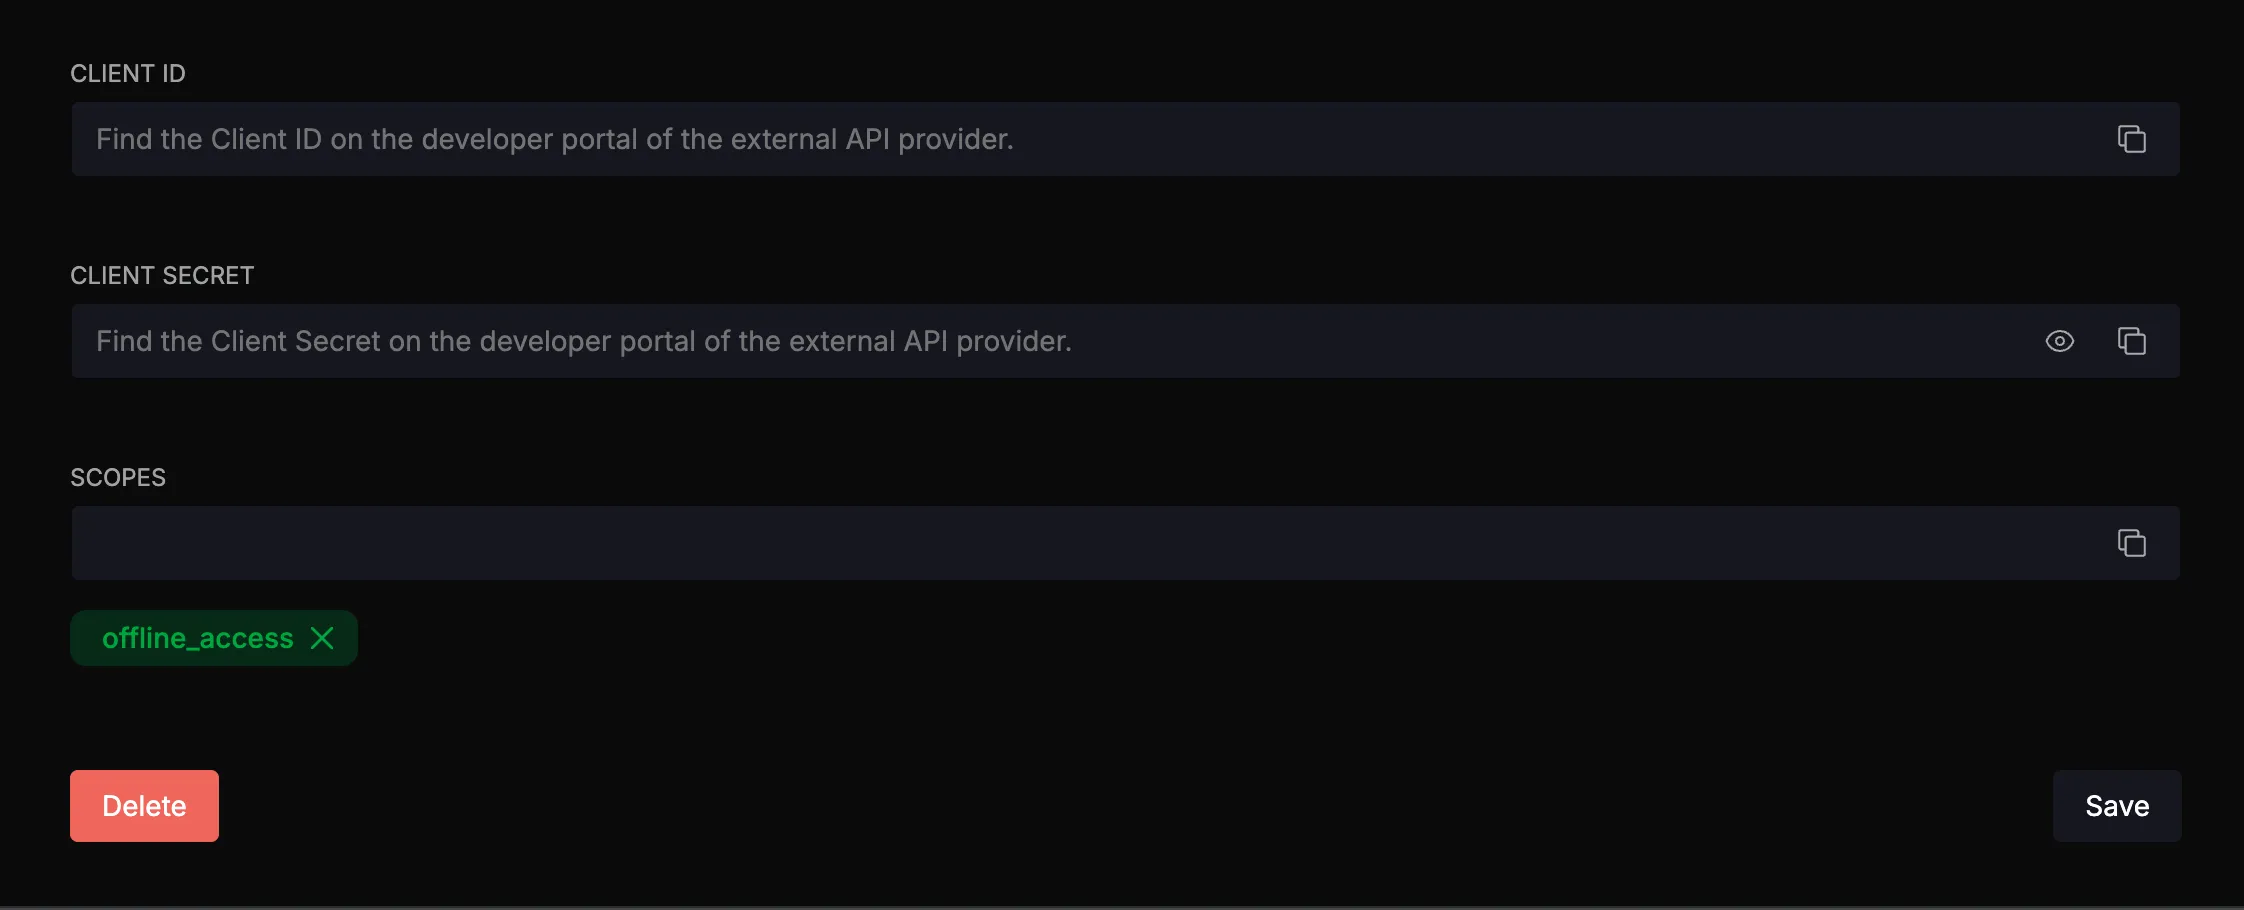
Section titled “OAUTH2 Integrations”For OAUTH2 integrations, first create an OAuth app within the target integration. The callback URL should be <NANGO_URL>/oauth/callback. Then configure the Client ID and Client Secret in Nango with the values from the integration provider.
BASIC, API_KEY, and OAUTH2_CC Integrations
Section titled “BASIC, API_KEY, and OAUTH2_CC Integrations”No modification to integration configurations is necessary — all required credentials are specified when creating the connection in the Kindo platform.
Provider-Specific Setup Guides
Section titled “Provider-Specific Setup Guides”Use the links below to create an OAuth app or obtain credentials for each provider. For OAUTH2 integrations, set the callback URL to <NANGO_URL>/oauth/callback.
OAUTH2
Section titled “OAUTH2”| Provider | Setup Guide |
|---|---|
| Box | Box Developer Documentation — OAuth 2.0 Setup |
| Dropbox | Dropbox App Console |
| GitHub | Creating an OAuth App |
| GitLab | OAuth Provider |
| Google Drive | OAuth 2.0 Protocol |
| Jira | Jira REST API Authentication |
| Linear | Linear OAuth 2.0 Authentication |
| Microsoft (OneDrive, Entra ID, Teams, Outlook) | Microsoft Identity Platform — Register an App |
| Slack | Slack API — Creating an App |
OAUTH2_CC (Client Credentials)
Section titled “OAUTH2_CC (Client Credentials)”| Provider | Setup Guide |
|---|---|
| CrowdStrike Falcon | See instructions below |
| ServiceNow | Connect to ServiceNow |
CrowdStrike Falcon — Client Credentials Setup
Docs: CrowdStrike OpenAPI
- Log into your CrowdStrike Falcon console.
- In the left sidebar, navigate to Support and Resources > API Clients and Keys.
- Create a new API client.
- Set the Base URL to match your CrowdStrike region (e.g.,
US-1,US-2,EU-1, orUS-GOV-1). - Click the client ID row to view and configure scopes. Grant the scopes required by your Kindo integration.
- Copy the Client ID and Client Secret — these are entered when creating the connection in the Kindo platform.
API_KEY
Section titled “API_KEY”| Provider | Setup Guide |
|---|---|
| Grafana | Service Accounts |
| NVD | Request an API Key |
| Tenable | Authorization |
| Provider | Setup Guide |
|---|---|
| Azure DevOps | Personal Access Tokens |
| Sumo Logic | Access Keys |
Integration Webhooks
Section titled “Integration Webhooks”Integration webhooks are required for using Integration Event triggers. Direct Webhook URL triggers do not require this configuration.
Linear Webhooks
Section titled “Linear Webhooks”-
In Linear, go to Settings > API and select the OAuth app created earlier.
-
Click the three dots > Edit Application.
-
Enable the Webhooks toggle.
-
Enter
<API_SERVICE_URL>/webhook/integration-connection/linearas the webhook URL. -
Select Issues under “Data change events”.
-
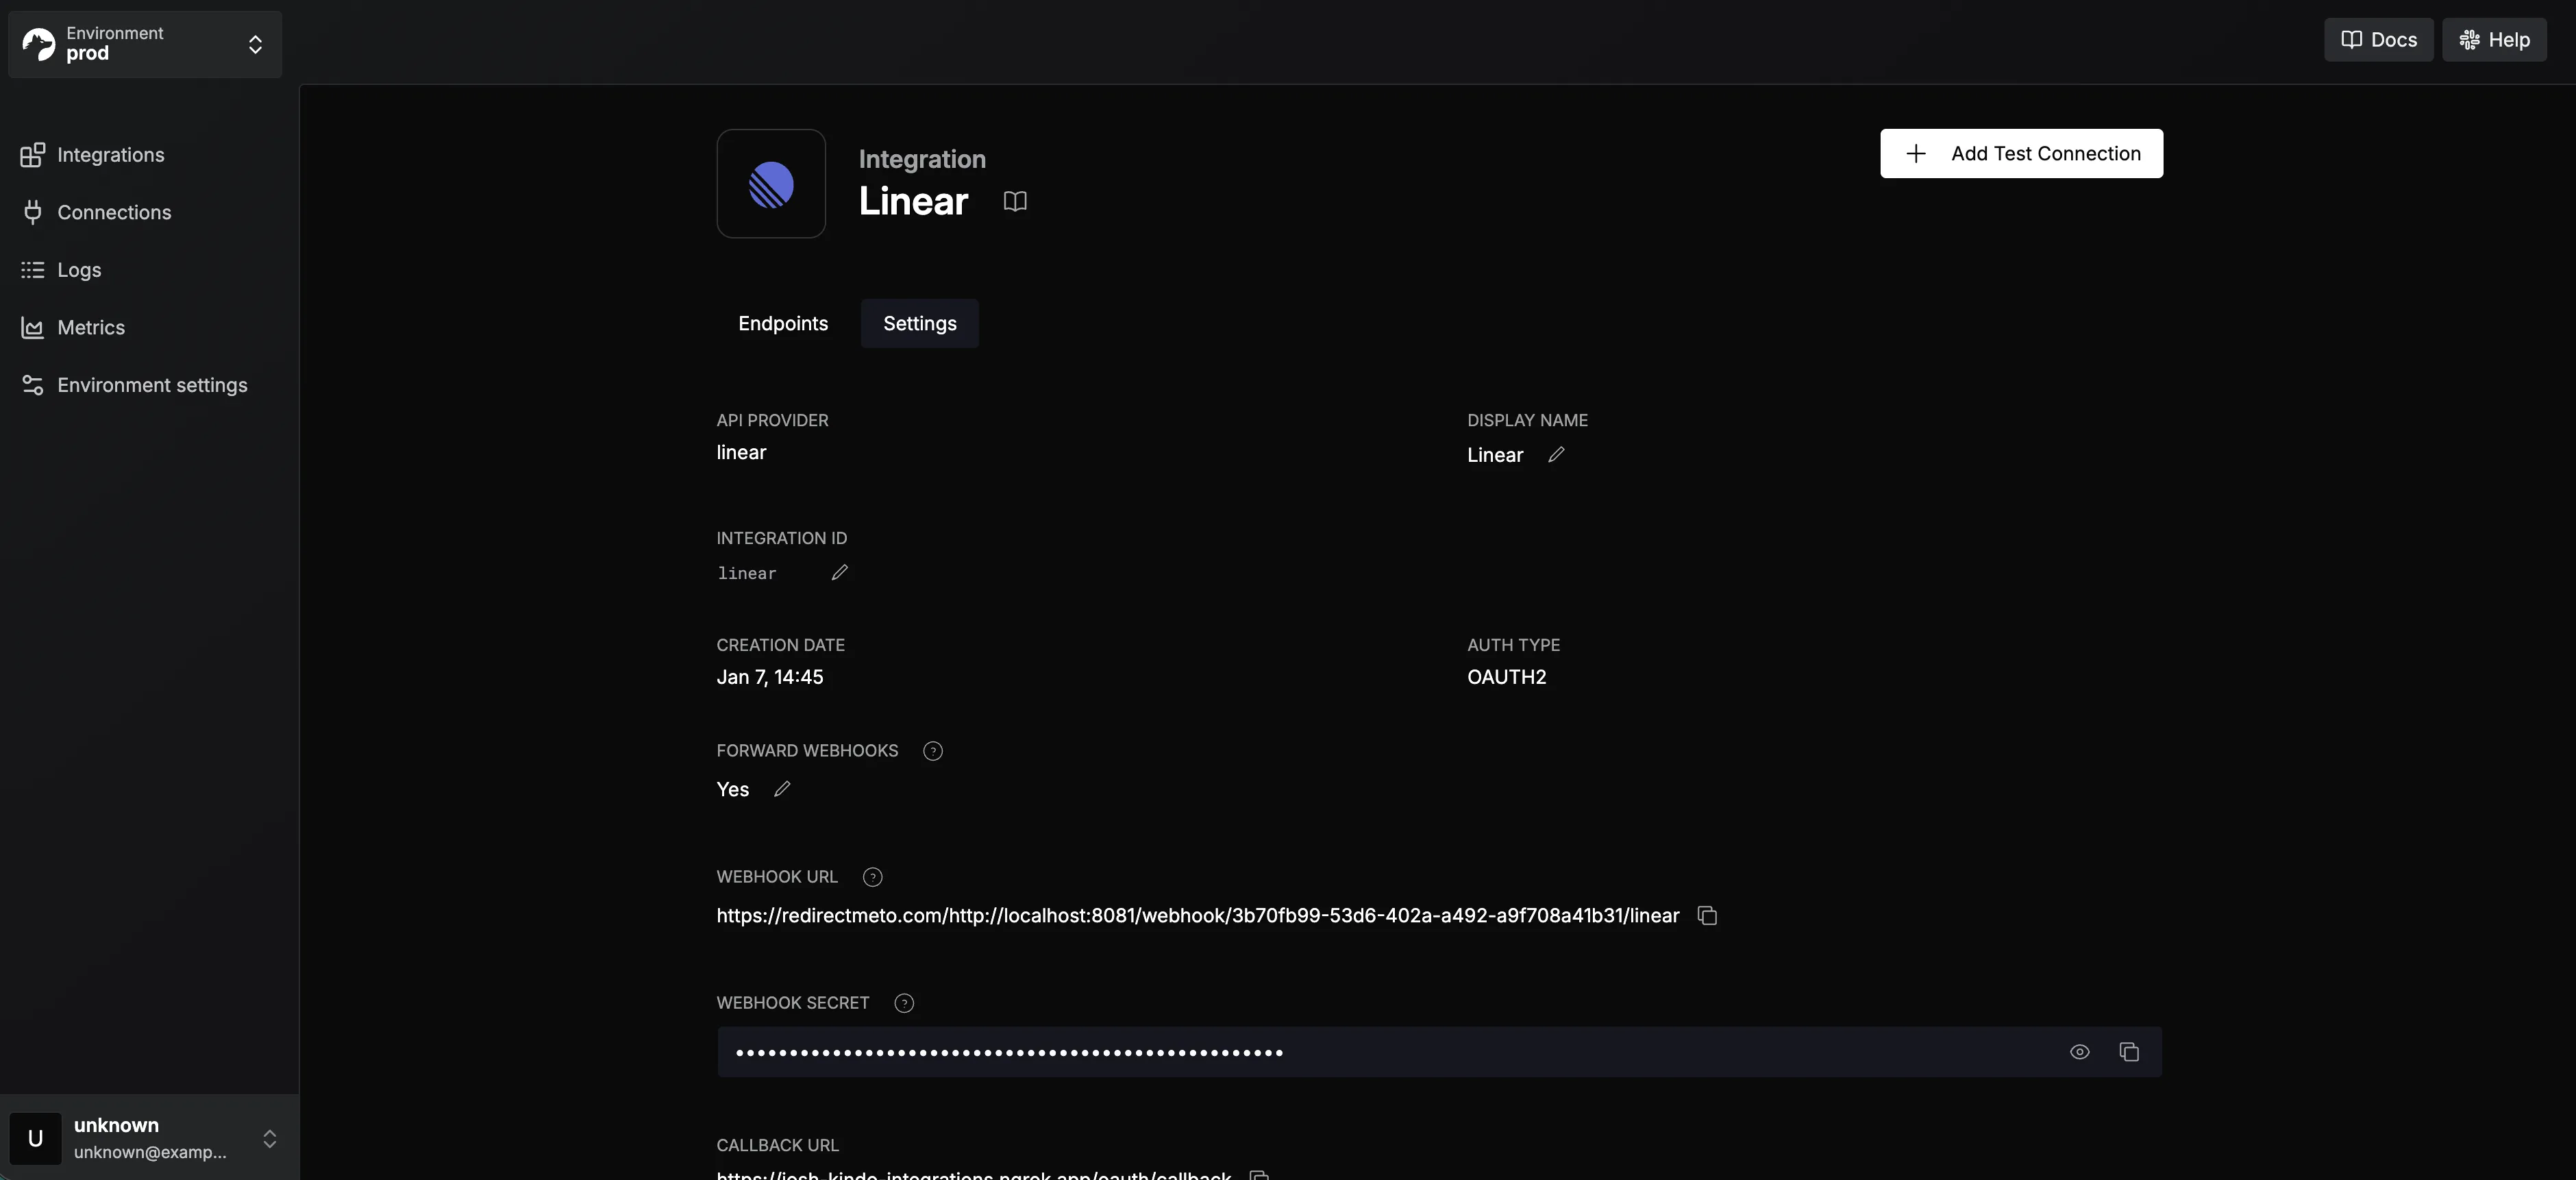
Copy the webhook signing secret.
-
In Nango, paste the secret into the Webhook Secret input and save.
Jira Webhooks
Section titled “Jira Webhooks”No additional setup is needed for Jira webhooks.
Enabling Integrations
Section titled “Enabling Integrations”Kindo keeps each installation’s IntegrationConfig rows in sync with the integration catalog that ships with the release — there is no manual sync step to run. Whenever the platform is deployed or upgraded, the reconciler registers the selected integrations with Nango and reconciles their metadata against the catalog automatically.
Which integrations are active is driven by install-contract.yaml and applied with the kindo CLI:
# See what is available and which are enabledkindo integrations list
# Enable one or more (prompts for OAuth credentials where needed)kindo integrations enable github slack
# Register the enabled integrations with Nango and reconcile their metadatakindo integrations apply
kindo integrations apply is idempotent and can be re-run any time the contract’s integrations change. It deploys the integrations-reconciler release, whose reconcile job registers each selected integration with Nango and reconciles its IntegrationConfig metadata against the catalog, marking each selected integration verified. For the full operator reference — including disable, bootstrap, and status — see Operate and Install with kindo-cli.
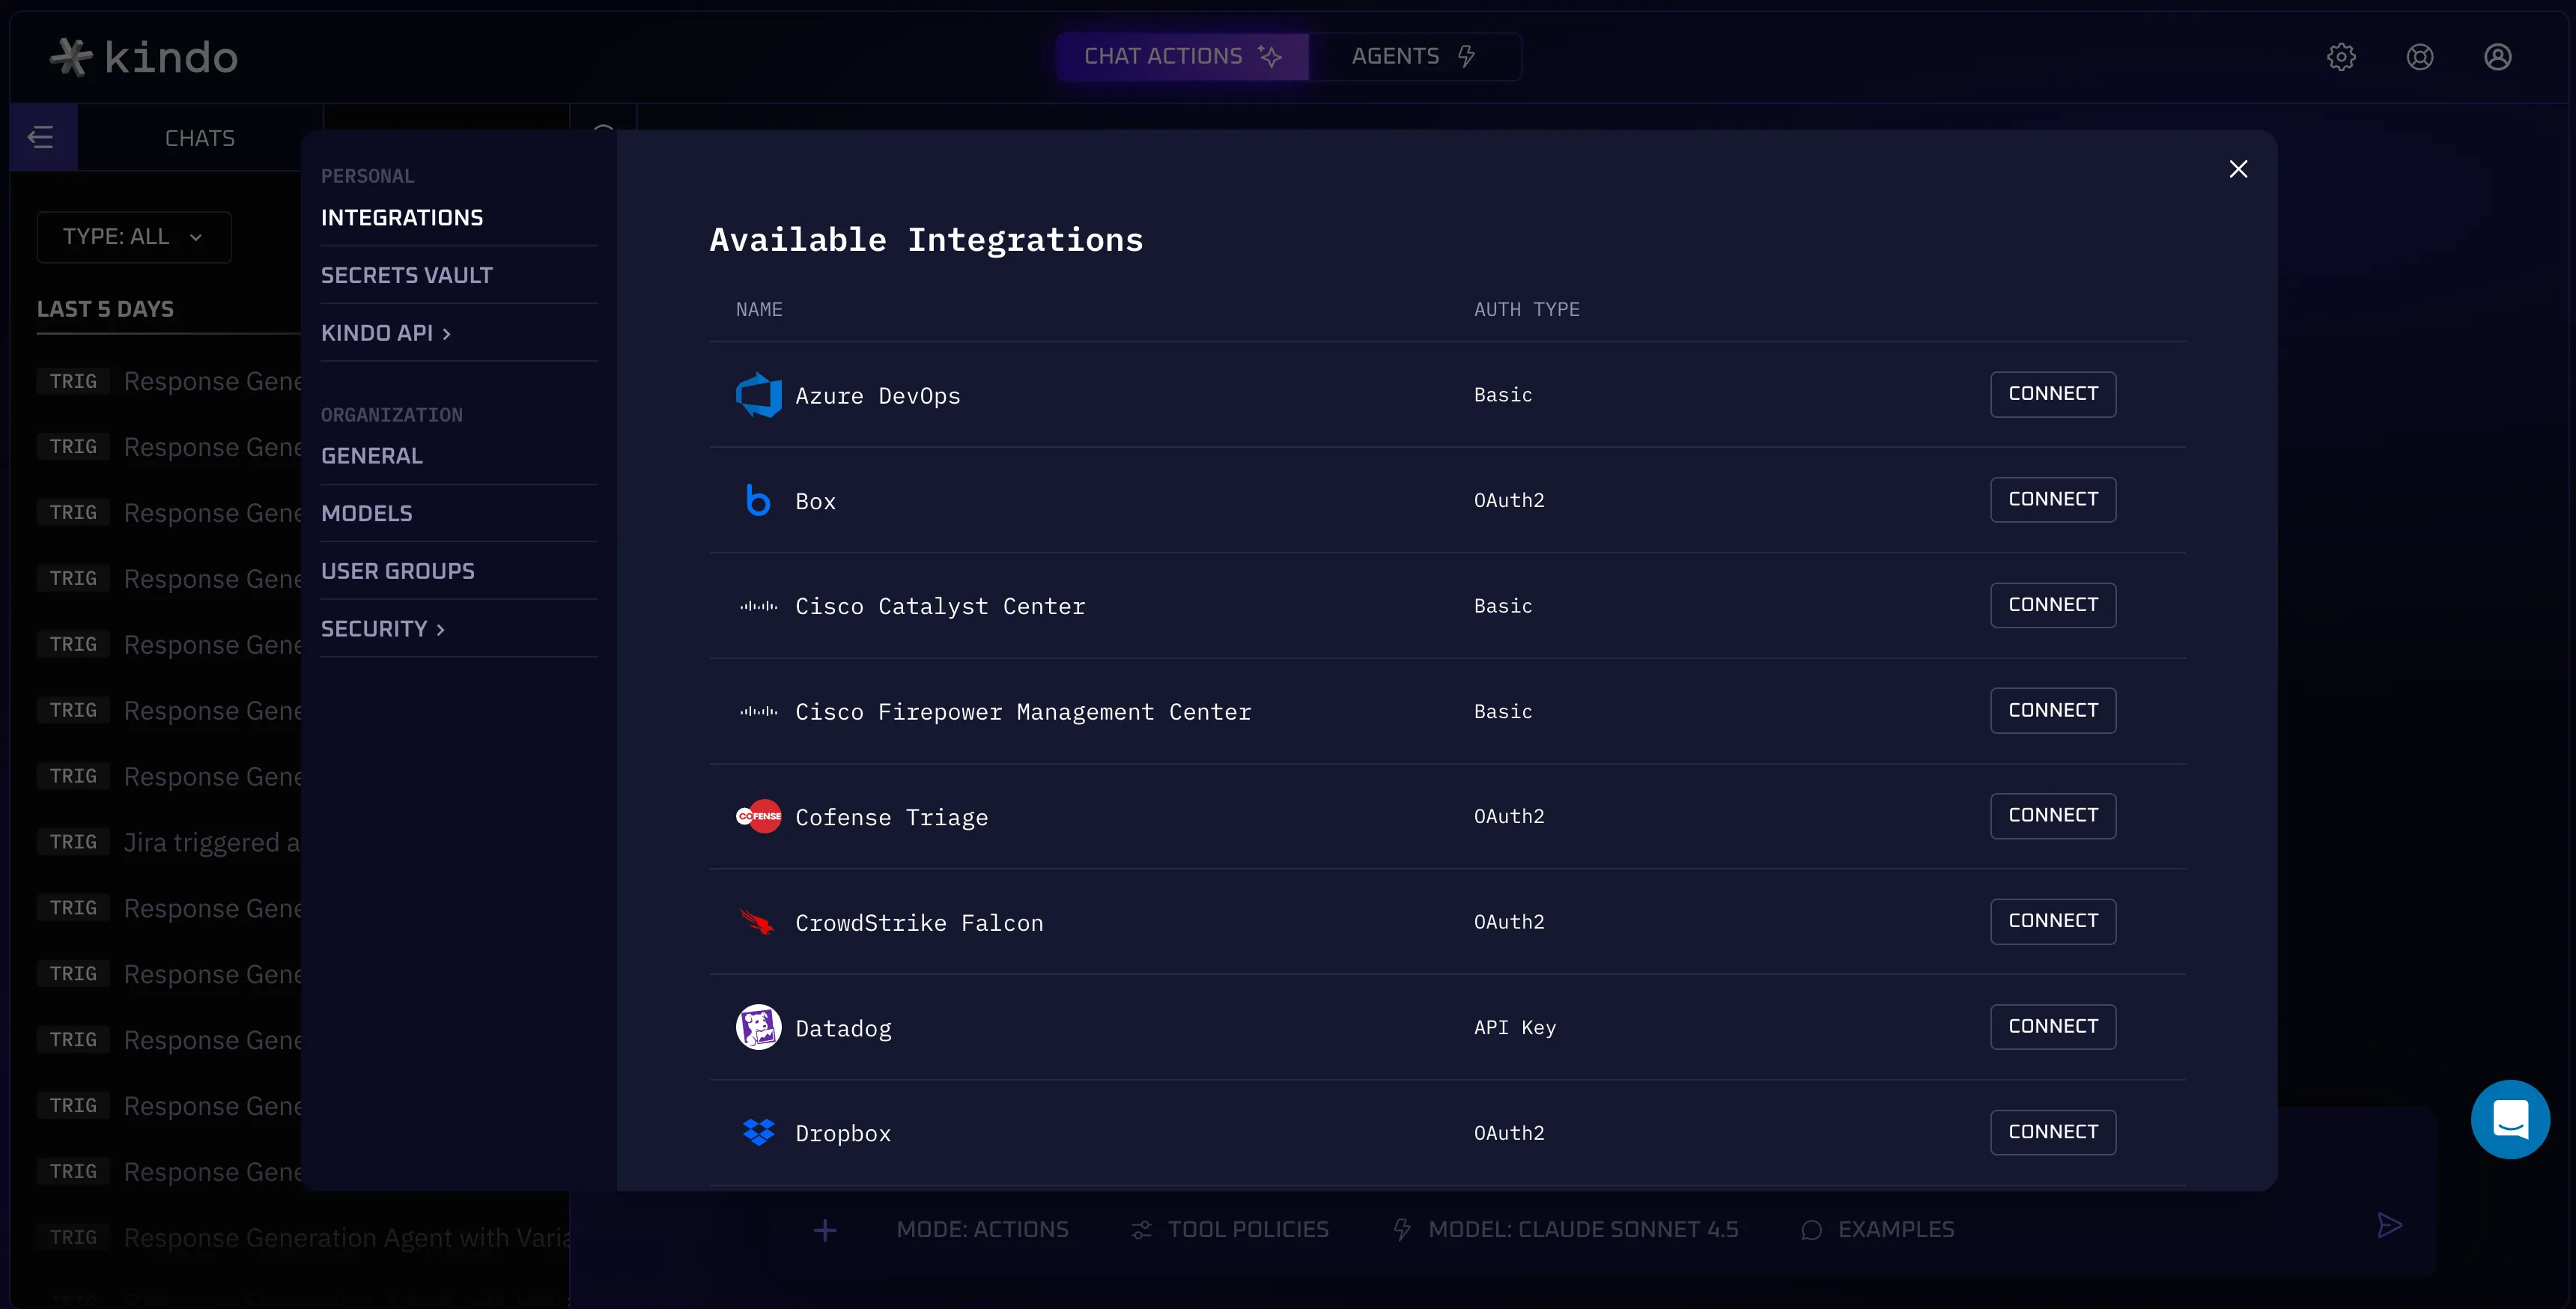
Then confirm in the Kindo app under Command Center > Manage Your Integrations:
MCP Server Setup
Section titled “MCP Server Setup”Each integration’s MCP routing — the mcpServerUrl and supportsWebhooks fields on its IntegrationConfig row — is owned by the integration catalog and applied by the reconciler. Do not set these by hand: any direct edit to the IntegrationConfig table is overwritten the next time the platform is deployed or kindo integrations apply runs.
The catalog provides each integration’s MCP server URL and the reconciler writes it to the row. The stored values look like:
http://mcp-grafana.mcp:80/mcphttp://mcp-box.mcp:80/mcphttp://mcp-unified.mcp:5050/linear/The stored URL is called exactly as written and includes the full path: /mcp for standalone MCP servers, or the integration’s mount path (e.g. /linear/) for servers hosted by the unified MCP service. Integrations that support event webhooks (for example Jira and Linear) have supportsWebhooks set from the catalog as well; see Integration Webhooks for the provider-side configuration those require.