
Single Sign-On (SSO) Setup
Single Sign-On (SSO) connects your identity provider (IdP) to Kindo through SAML. Settings → SSO appears under Organization for organization Admins. Each organization has one SAML connection.
Configure SSO for an organization
Section titled “Configure SSO for an organization”-
Open Settings → SSO. Select Create SAML connection if your organization has no connection. Use the existing connection if one is present.
-
In Service Provider Configuration, use the copy buttons for ACS URL and SP Entity ID. Add these values to your identity provider’s Kindo application.
-
Configure the application’s SAML attributes.
-
In Identity Provider (IdP) Configuration, select Upload metadata XML and choose the IdP metadata file. The file imports immediately. To use pasted XML, paste the XML contents and select Import.
For manual configuration, enter IdP Entity ID, Redirect URL, and the full PEM Signing certificate. Select Save. After import or save, confirm that the certificate shows
Valid until <date>. -
Assign a pilot user or group to the IdP application. Open Kindo in a private browser window. Select Continue with SAML SSO and enter the pilot user’s email address. Complete sign-in with your identity provider.
-
If your organization uses the Kindo application tile in your identity provider, test sign-in from that tile too.
-
If your organization requires SSO, enable SSO Enforcement after the pilot sign-ins succeed. Test sign-in again with enforcement enabled.
SAML attributes
Section titled “SAML attributes”Use these exact attribute names. Leave the namespace blank.
| Attribute | Requirement | Value |
|---|---|---|
email | Required unless the SAML Name ID contains the email address | The user’s Kindo email address on your organization’s verified domain |
givenName | Optional, recommended | The user’s first name |
surname | Optional, recommended | The user’s last name |
Kindo reads the email address from email, with the SAML Name ID as a fallback. If you send both, use the same email address.
Send givenName and surname to populate the user’s display name. The display name falls back to displayName, then the Name ID.
Identity provider guides
Section titled “Identity provider guides”ADFS example
Section titled “ADFS example”-
Create a Relying Party Trust in ADFS. Use the SP Entity ID and ACS URL from Kindo’s Service Provider Configuration.
-
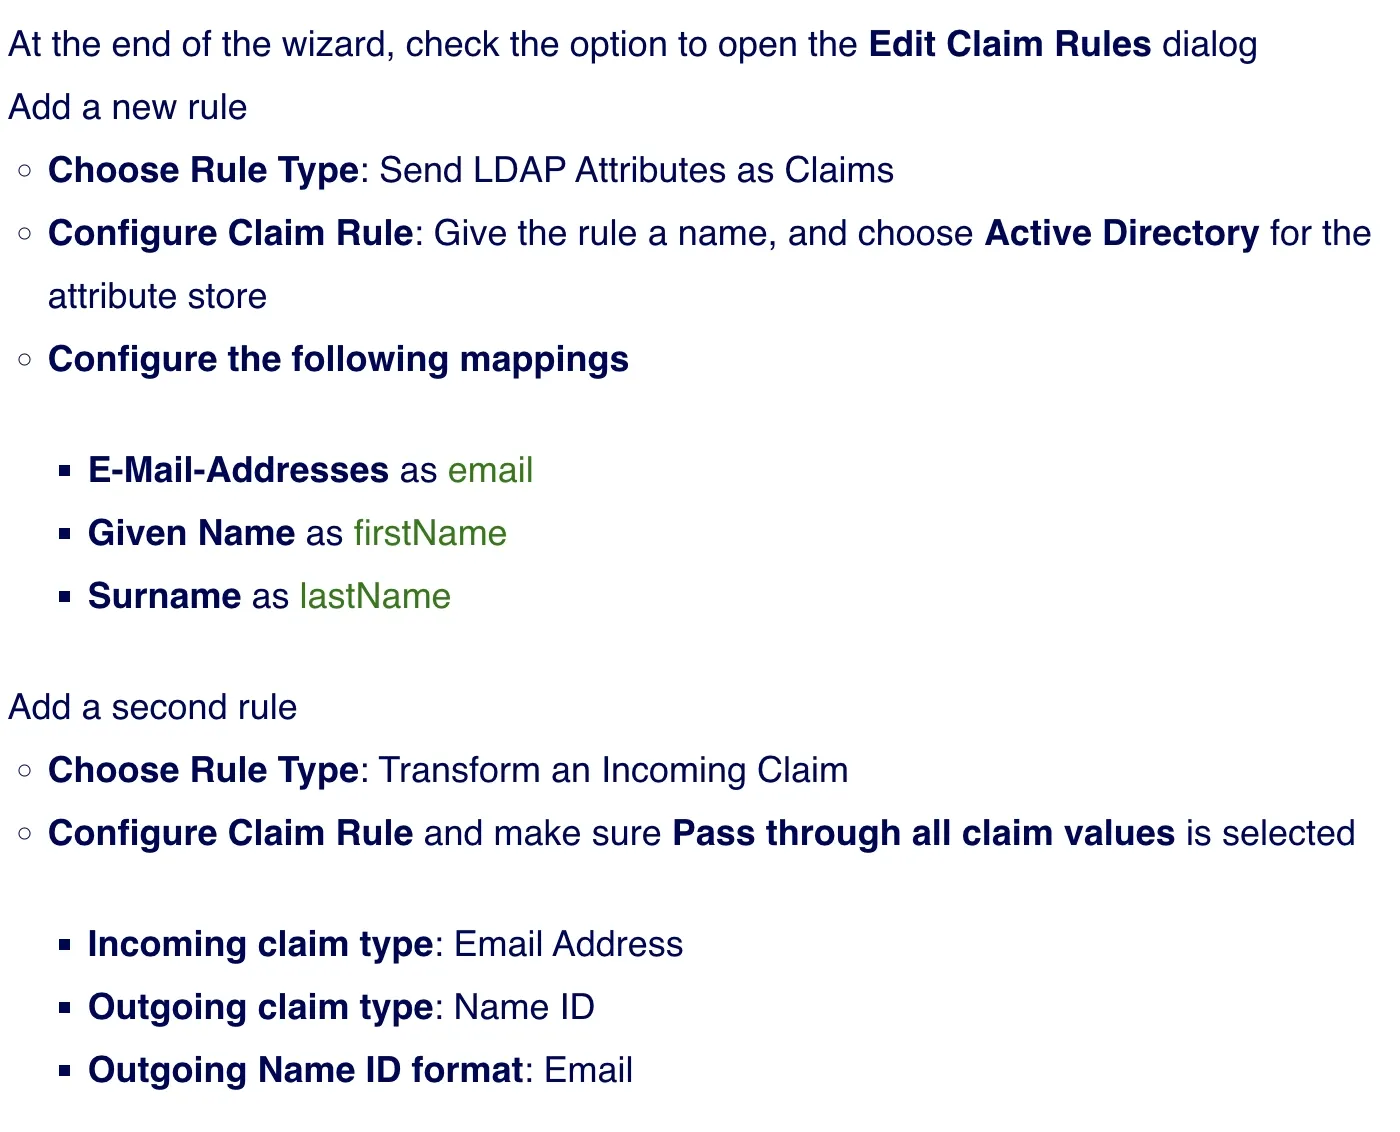
Add a Send LDAP Attributes as Claims rule with these mappings:
LDAP attribute Outgoing claim E-Mail-Addresses emailGiven Name givenNameSurname surname -
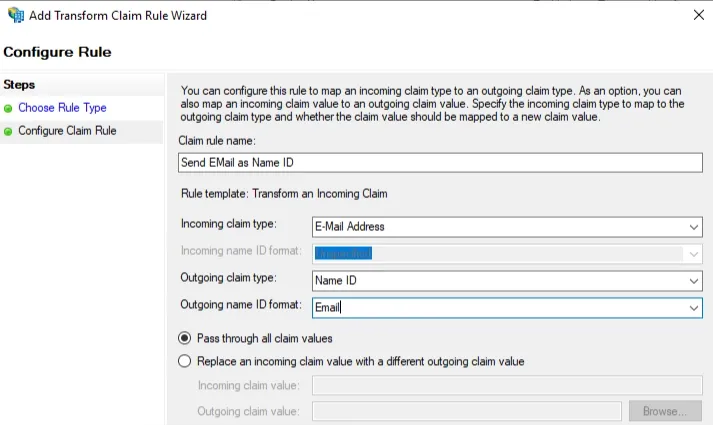
Add a Transform an Incoming Claim rule. Set the incoming claim type to E-Mail Address. Set the outgoing claim type to Name ID and the format to Email. Select Pass through all claim values.
How users sign in
Section titled “How users sign in”-
On the Kindo login screen, select Continue with SAML SSO.
-
Enter your email address. Kindo redirects you to your identity provider.
-
Complete sign-in with your identity provider.
You can also select the Kindo application tile in your identity provider. Both paths return you to Kindo.
Kindo creates an account on a user’s first SSO sign-in when their email address uses the organization’s verified domain. This is just-in-time provisioning.
Require SSO
Section titled “Require SSO”Configure IdP Entity ID, Redirect URL, and Signing certificate before enabling enforcement. With SSO Enforcement enabled, organization members must use SSO for sign-in.
-
Complete the pilot sign-in tests above.
-
Open Settings → SSO.
-
Turn on SSO Enforcement.
-
Test a fresh sign-in in a private browser window.